
티스토리 뷰
Bot Father로부터 내 봇 생성하기
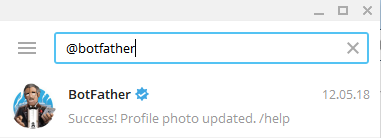
Python으로 Telegram 챗봇을 만들어 보자. 먼저 Telegram에서 @botfather을 검색한다.
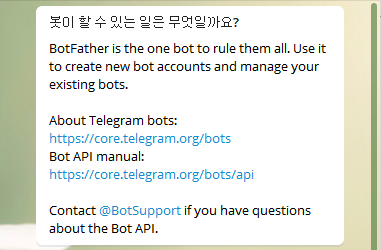
이런 메시지를 받게 되는데, /start 명령어를 입력하면 시작하게 된다.
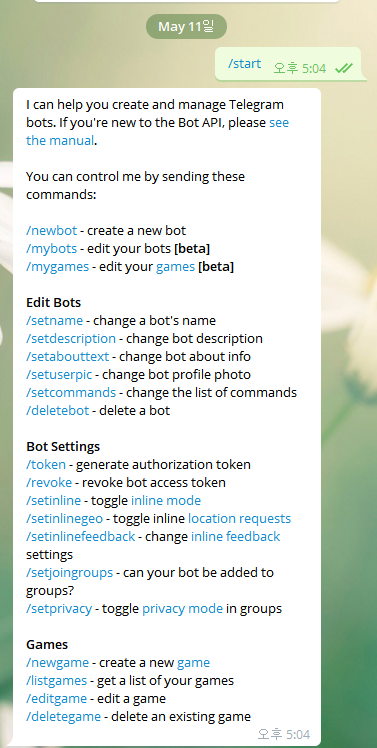
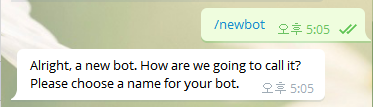
다음으로 `/newbot` 명령어를 통해 봇을 생성 가능하며, 봇 이름과 사용자 이름까지 입력하면 봇이 생성이 된다.
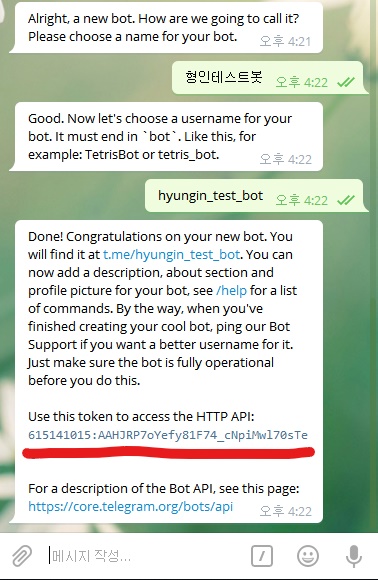
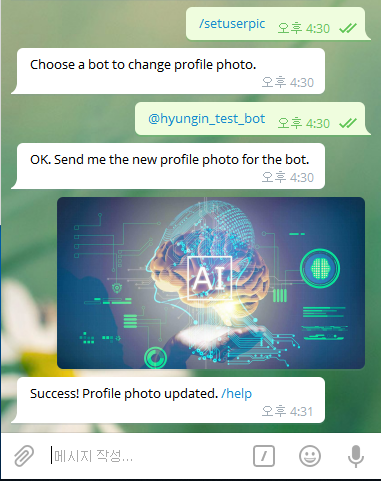
그리고 위 이미지에 빨간 줄로 밑줄 그은 부분은 내가 만든 봇의 TOKEN으로 나중에 필요로 한다. 다음으로 봇의 프로필 사진을 바꾸고 싶다면 `/setuserpic` 명령어를 입력 후 원하는 사진을 올려주면 된다.
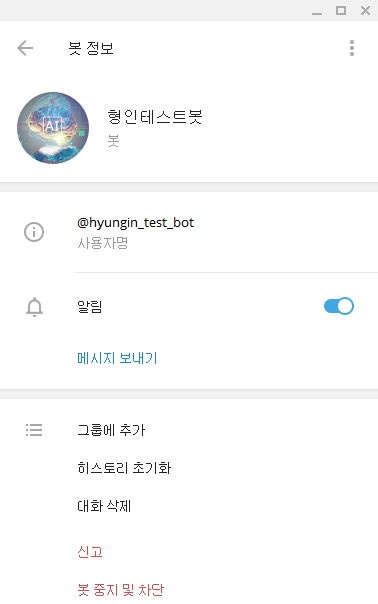
그럼 최종적으로 이렇게 봇이 만들어지게 된다.
봇 코드 구현
봇을 성공적으로 만들었으니 이제 다음 단계로 넘어가 보자. PyCharm을 통해 새 프로젝트를 만들고 `main.py`를 만들어보자.
[봇 api로는 python-telegram-bot을 사용했다.] [(참고 주소)](https://python-telegram-bot.org/)
pip를 이용할 경우에는 이렇게 설치가 가능하다.
$pip install python-telegram-bot --upgrade
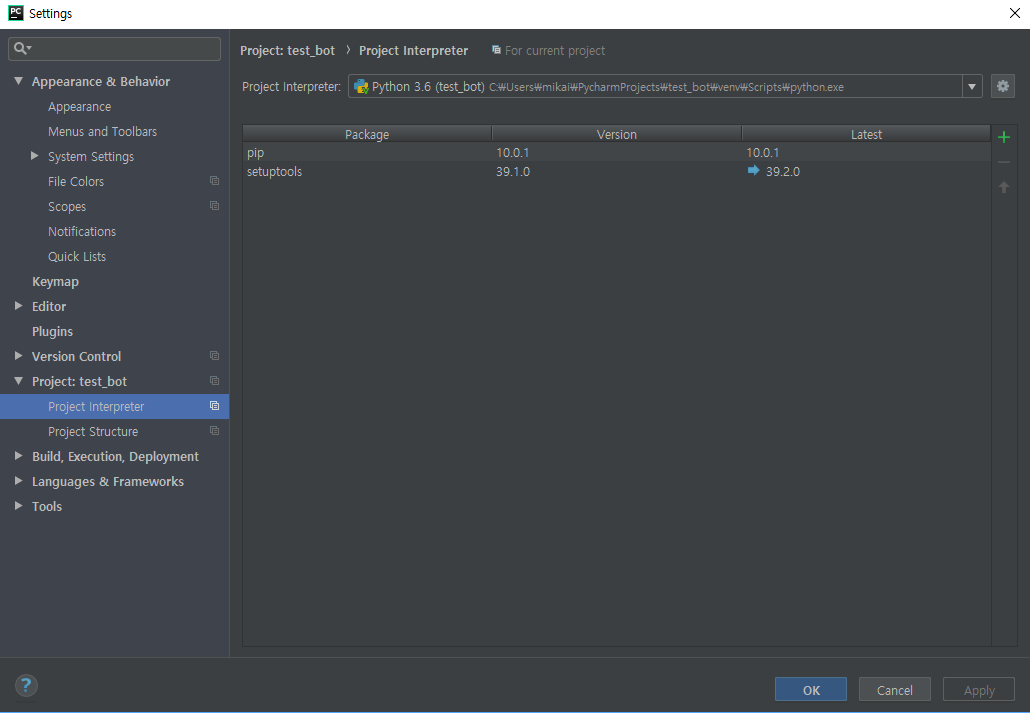
PyCharm에서 python-telegram-bot라이브러리를 임포트 해준다.
`Ctrl + alt + s`입력 후 녹색 +를 눌러 추가할 수 있다.
프로젝트를 생성했으면 아래 코드를 붙여넣자
#import modules
from telegram.ext import (Updater, CommandHandler, MessageHandler, Filters,)
import logging
# Enable logging
logging.basicConfig(format='%(asctime)s - %(name)s - %(levelname)s - %(message)s', level=logging.INFO)
logger = logging.getLogger(__name__)
#My bot token from BotFather
token = 'Bot father에게 받은 bot token을 넣어준다.'
# define command handlers
def start(bot, update):
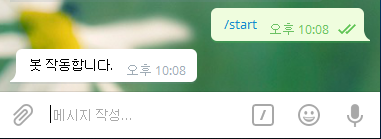
bot.send_message(chat_id=update.message.chat_id, text="봇 작동합니다.")
# 정해진 커맨드가 아닌 다른 명령을 받았을 때 출력할 메시지
def unknown(bot, update):
bot.send_message(chat_id=update.message.chat_id, text="죄송하지만 그 명령어를 이해할 수 없습니다.")
# main문을 정의하고
def main():
# Create Updater object and attach dispatcher to it
updater = Updater(token)
dp = updater.dispatcher
print("Bot started")
# Start the bot
updater.start_polling()
dp.add_handler(CommandHandler('start', start))
dp.add_handler(MessageHandler(Filters.command, unknown))
# Run the bot until you press Ctrl-C
updater.idle()
updater.stop()
if __name__ == '__main__':
main()telegram.ext는 여러 클래스로 구성되어 있지만 가장 중요한 요소가 Updater와 Dispatcher인데 Updater클래스는 telegram에서 새 업데이트는 계속 가져와서 Dispatcher 클래스에 전달한다. Updater 오브젝트를 작성하면 Dispatcher가 작성되어 대기열과 함께 링크되며, Dispatcher에 등록된 핸들러에 따라 Updater에서 가져온 업데이트를 정렬하고 정의한 콜백 함수로 전달하는 다양한 유형의 핸들러를 등록할 수 있다.
코드를 잘 붙여 넣었다면 아래와 같이 잘 작동할 것이다.
멜론 실시간 차트 받아오기
웹 크롤링으로 멜론 실시간 차트를 받아올 수 있는 기능을 만들어주자. 본인은 `modules` 디렉터리에 `melon_rank.py` 파일을 만들었다. 웹에서 정보를 가져오기 위해서는 `requests` 라이브러리가 필요하다.
$pip install requests
pip로 설치하거나 파이참 라이브러리 추가해주면 된다.
다만 requests만으로는 html을 python이 이해하는 객체 구조로는 만들어주지 못한다. 따라서 `BeautifulSoup`을 이용하게 되는데. 이 라이브러리는 html 코드를 python이 이해하는 객체 구조로 변환하는 Parsing을 맡고 있기 때문이다. 마찬가지로 라이브러리를 설치해준다.
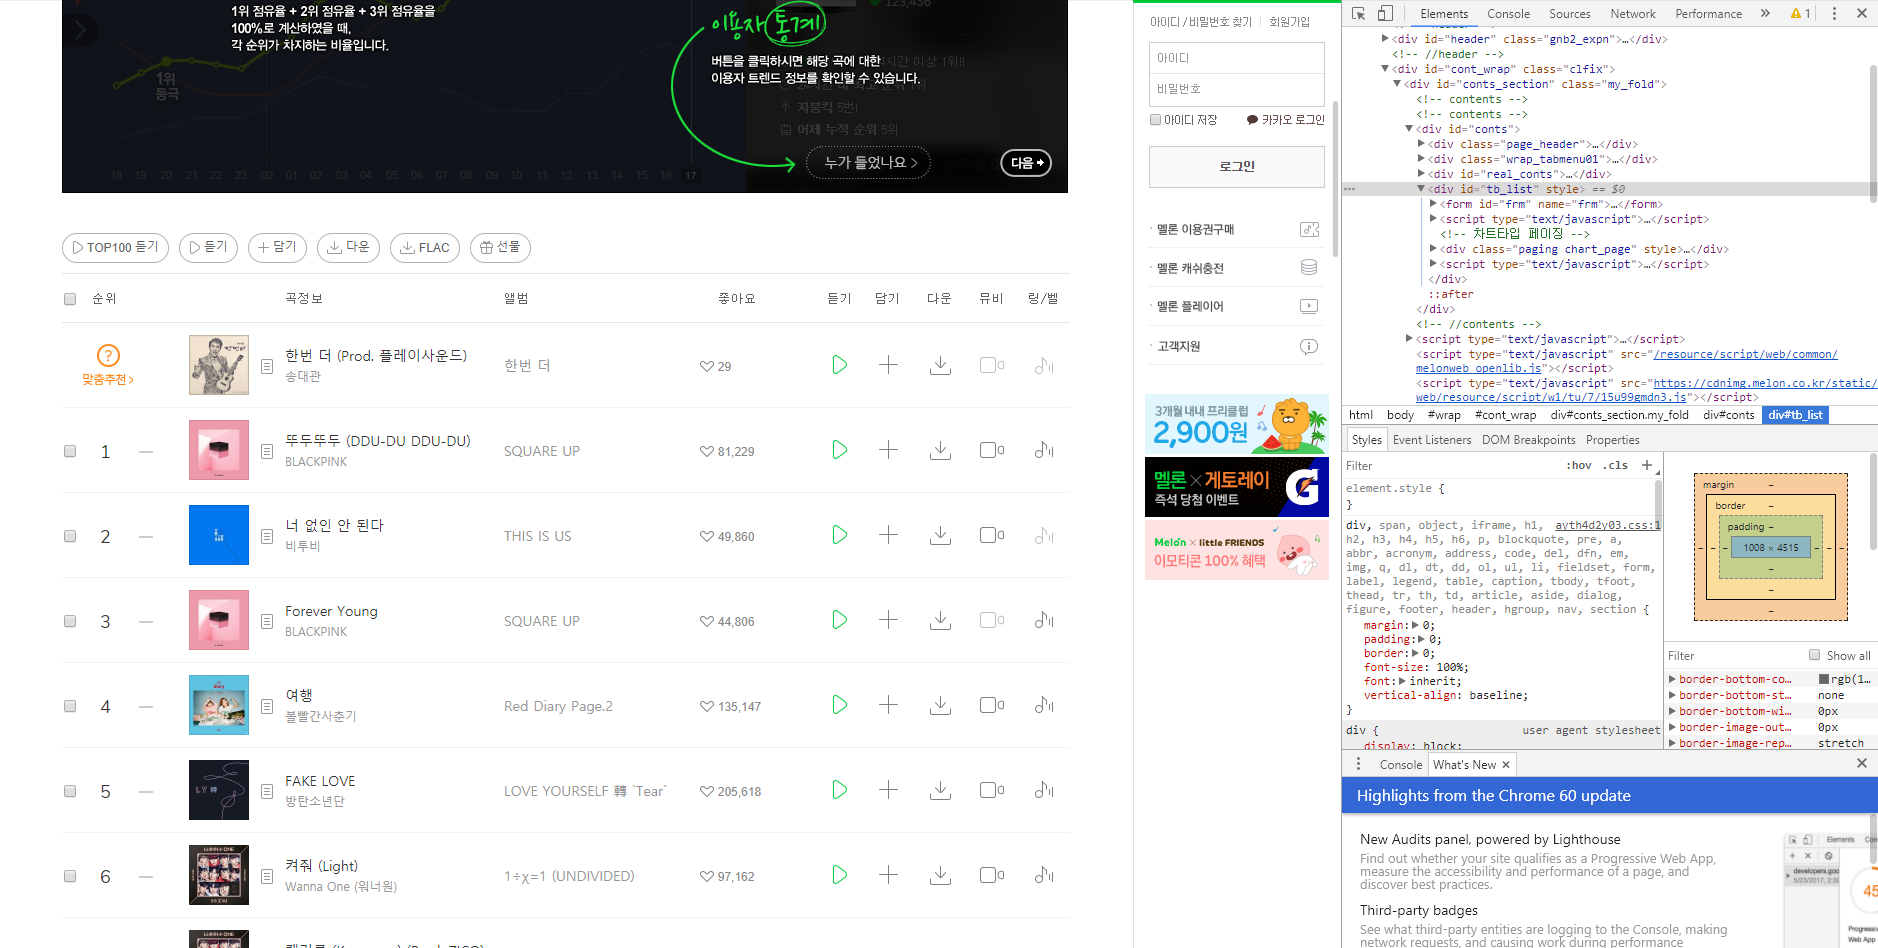
멜론 TOP 100 https://www.melon.com/chart/index.htm에 들어가서 f12를 눌러주면 정보를 볼 수 있는데, 여기서 원하는 테이블을 찾아서 사용하면 된다.
`modules`디렉터리`melon_rank.py`에 코드를 작성해보자.
from bs4 import BeautifulSoup
import requests

def show_music_rank(self, update):
    header = {'User-Agent': 'Mozilla/5.0 (Windows NT 6.3; Trident/7.0; rv:11.0) like Gecko'}
    addr = 'https://www.melon.com/chart/index.htm'
    self.addr = addr
    melon = requests.get(self.addr, headers = header)
    soup = BeautifulSoup(melon.text, 'html.parser')

    titles = soup.select('#lst50 > td > div > div > div.ellipsis.rank01 > span > a')
    artist = soup.select('#lst50 > td > div > div > div.ellipsis.rank02 > span')
    update.message.reply_text('실시간 멜론 차트\n'
                              + '1위: ' + titles[1].text + " - " + artist[1].text + '\n'
                              + '2위: ' + titles[2].text + " - " + artist[2].text + '\n'
                              + '3위: ' + titles[3].text + " - " + artist[3].text + '\n'
                              + '4위: ' + titles[4].text + " - " + artist[4].text + '\n'
                              + '5위: ' + titles[5].text + " - " + artist[5].text + '\n'
                              + '6위: ' + titles[6].text + " - " + artist[6].text + '\n'
                              + '7위: ' + titles[7].text + " - " + artist[7].text + '\n'
                              + '8위: ' + titles[8].text + " - " + artist[8].text + '\n'
                              + '9위: ' + titles[9].text + " - " + artist[9].text + '\n'
                              + '10위: ' + titles[10].text + " - " + artist[10].text + '\n'
                              )
코드 작성 시 반복문을 사용해도 되지만, 반복문을 사용하지 않은 것은 반복문을 사용하게 되면 그만큼의 메시지 박스가 계속 떠오르기 때문에 불편해도 이렇게 만들었다.
다시 `main.py`로 돌아가서 이렇게 두 줄 추가해주면 된다.
from modules.melon_rank import show_music_rank

# def main(): 안에다가 추가해준다.
dp.add_handler(CommandHandler('최신음악',show_music_rank))
최종적으로 이렇게 하나의 메시지 박스 안에 담겨 나온다.
참고자료
https://beomi.github.io/2017/01/20/HowToMakeWebCrawler/
https://python-telegram-bot.org/
mikail0205.github.io에서 원래 작성했던 게시글을 그대로 옮겨온 것
'IT 관련 공부' 카테고리의 다른 글
| Python으로 Telegram 챗봇 만들기(4) - 네이버 실시간 인기검색어 받아오기 (0) | 2019.08.22 |
|---|---|
| Python으로 Telegram 챗봇 만들기(3) - 네이버 영화순위 받아오기 (0) | 2019.08.22 |
| Python으로 Telegram 챗봇 만들기(2) - 네이버 날씨 받아오기 (0) | 2019.08.22 |
| CS231n Lec2(번역) (0) | 2019.04.12 |
| CS231n Lec1(번역) (0) | 2019.04.11 |
- Total
- Today
- Yesterday
- chatbot
- 챗본만들기
- 청도맥주축제
- 85도씨커피
- 챗봇
- Python
- 금사탄
- 청도맥주박물관
- 파이썬
- AI그림 그리기
- Machine Learning
- 삼성생명현장실습
- 샹산
- Qingdao
- 텔레그램
- 청도맥주
- stable diffusion
- 스펀
- 예스진지
- 청도여행
- ai그림
- 텔레그램 봇
- telegram
- 대만여행
- image classification
- 칭다오
- 진취덕
- web ui
- 텔레그램 챗봇
- CS231n
| 일 | 월 | 화 | 수 | 목 | 금 | 토 |
|---|---|---|---|---|---|---|
| 1 | 2 | 3 | 4 | |||
| 5 | 6 | 7 | 8 | 9 | 10 | 11 |
| 12 | 13 | 14 | 15 | 16 | 17 | 18 |
| 19 | 20 | 21 | 22 | 23 | 24 | 25 |
| 26 | 27 | 28 | 29 | 30 | 31 |